Camera Settings 103: Identifying ISO
What is ISO in Photography?
ISO is one of the three major controls that influence the brightness of your photo. While aperture and shutter speed determine how much light physically enters the camera, ISO determines how sensitive your camera’s sensor is to that light.
When you increase your ISO, the sensor becomes more sensitive—meaning it needs less light to create a properly exposed image. When you decrease your ISO, the sensor becomes less sensitive and needs more light to brighten the photo. Put simply:
ISO is a brightness control. Raise it to brighten the photo, lower it to keep the image cleaner.
However, choosing the right ISO is not just about exposure—it also affects image quality. Lower ISO settings generally produce the cleanest, sharpest images with the least amount of digital “noise.” Higher ISO settings help when light is limited or when motion needs to be frozen, but they can introduce grain and reduce color accuracy.
The best ISO choice depends on two things:
How bright your environment is, and
Whether anything in your scene is moving
Good lighting and still subjects usually allow you to choose a lower ISO. Fast-moving subjects or dim rooms may require a higher ISO so you can use a faster shutter speed.

How to Adjust Camera ISO?
Most digital cameras offer multiple ways to control ISO, and the exact buttons vary by brand. As a general rule:
Lower ISO → requires longer exposure time
Higher ISO → allows shorter exposure time
Adjusting your ISO is really about balancing brightness, motion, and image quality. Many cameras allow ISO “stops,” which are preset ISO increments—common ranges include 200–1600 or 200–3200—making it easier to control how sensitive the sensor becomes.
Auto Mode
Your camera chooses the ISO for you by evaluating the lighting in the scene. This is great for quick snapshots or new photographers who want to focus more on composition and less on settings.
ISO Priority Mode
Some cameras include an ISO Priority mode that allows you to manually choose the ISO, while the camera handles both aperture and shutter speed. This is helpful when you want consistent brightness or a specific level of noise control.
Manual Mode
Manual Mode gives you complete control: ISO, shutter speed, and aperture are all selected by you. The camera will not compensate for changes in lighting, which makes this mode perfect for learning exposure intentionally and building consistent technique.
How Does Digital ISO Work?
Think of ISO like adjusting the sensitivity on a microphone. If you turn up the microphone’s sensitivity to capture a quiet sound, it records the voice—but it also records extra noise in the background.
ISO works the same way.
When you raise your ISO, your camera boosts the signal to make the image brighter—but it also increases noise, which appears as grain, discoloration, and speckled shadows. High ISO can also reduce:
Color accuracy
Dynamic range
Editing flexibility in post-processing
This doesn’t mean high ISO is bad—just that it’s a tool to use intentionally when the situation requires it.

Pro-Tip:
Doubling your ISO will roughly double your shutter speed.
This is extremely useful in low-light situations when you need to freeze motion.
Example:
ISO 800 → 1600
Shutter 1/250 → 1/500
Helpful Note:
Full-frame sensors typically perform better at high ISO levels because they have larger photosites, which gather more light with less noise.
What is Base ISO?
Base ISO is the lowest ISO your camera can use while preserving maximum image quality. It is determined by the physical characteristics of your sensor’s photosites—the tiny light-collecting elements beneath the shutter.
Most cameras have a base ISO of 100 or 200, depending on the manufacturer. Shooting at base ISO gives you:
The cleanest image
Highest dynamic range
Least amount of digital noise
However, base ISO requires plenty of environmental light—or the use of a tripod—because lower ISO settings demand longer exposure times.
Pro-Tip:
If you need to keep your ISO low but still want a well-exposed image, open up your aperture (use a lower f-stop). This allows more light in while also giving you creative control over depth-of-field.
So What ISO Should You Use?
Your ideal ISO depends on lighting, movement, and the look you’re trying to achieve. Here are general guidelines to help:
Low ISO (Base – 800)
Ideal for: Outdoor Photography
Landscapes
Cityscapes
Architecture
Still-life
Use when you have good light or when using a tripod.
Mid ISO (800 – 3200)
Ideal for: Indoor Photography
Lifestyle
Wildlife
General-purpose shooting
Good for lower light or when subjects may move slightly.
High ISO (3200 – 6400+)
Ideal for: Night Photography
Stars
Moon
Nightlife
Concerts
Use when freezing motion or shooting handheld in very low light.
Final Thoughts
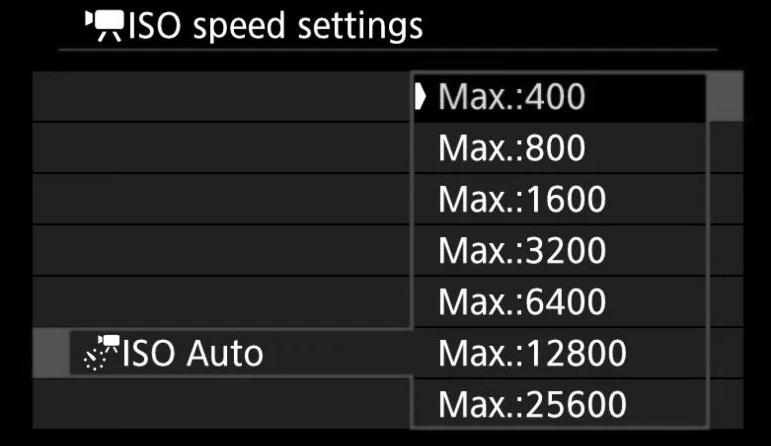
Personally, I shoot in Aperture Priority Mode for most situations and let the camera select the best ISO automatically. Many cameras also offer an option to set an ISO limit, which prevents the camera from choosing values that may introduce too much noise.
One of the best ways to understand ISO is to experiment:
Take several photos of the same scene, change only your ISO, and compare the results. Notice the differences in brightness, grain, color, and dynamic range.
The more you practice, the more instinctive your ISO choices will become. Photography is both a science and an art—so explore, experiment, and enjoy the process.
(And if you’re shooting at slower shutter speeds, don’t forget to use a tripod to eliminate camera shake!)